
The ten inch tee-hinge bolted into place.

Again, use the truck as saw-horse and build the chapel doors.

A view into the work site from the road.

The versatile portable drill, and versatile short screws.

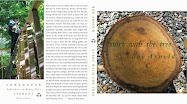
After the traveler passes by on the road along the stone wall comes the chalkboard and often a poem.

One finished pine door, and one more to match. I wanted to build both doors over two days, then take the third day off with Sweetheart and our bicycles.

The overhead lumber rack is now in place.

Bed the screw.

Getting ready to hang two doors.

These two jacks, who have traveled with me for decades (and look it) are the helpers deluxe when coming to lift the doors into position. Spruce blocks, wood shingle shims, any old board also help the installment along.

After one of two doors is bolted into place (not screws), measure out and see how the next door has a clearance magic of "1/4." That's what you're shooting for.
These two jacks, who have traveled with me for decades (and look it) are the helpers deluxe when coming to lift the doors into position. Spruce blocks, wood shingle shims, any old board also help the installment along.
After one of two doors is bolted into place (not screws), measure out and see how the next door has a clearance magic of "1/4." That's what you're shooting for.

Both doors up and plumb, windows aligned, closing without complaint.

Here we have the doors almost finished, painted two-color and a brace against the door waiting for hardware to be installed. The bottom of both doors will have a hinged flap installed to be lifted during deep snow (winter) and back down for normal use.

If you look closely, the day after I finished building the chapel, a tree crew scheduled for October arrived a month earlier than expected, with a crane, and removed a mammoth white pine tree and this twin sugar maple tree right next to the chapel. You can see the saw chips on the stonewall. I asked the crew to leave ten feet of one of the maple trees and level the top. On that top I plan to install something . . . the ideas are percolating. The new sunshine, without the trees, is quite a gift.

Begin stenciling the big doors — one first coat and then go over the petals, free hand, with a second coat. The building will be stenciled with one thick tube of yellow paint.

Tap tap tap the color in and don't let your hand slip. The masking tape doesn't work on the painted steel surface anyway.

The rarely seen back wall faces the woods and for the moment has one line trace of leaves. I will do another line of leaves higher up before snow falls.

Some times with stenciling, a little is better than a lot more.

Remember the scaffolding? — well, after I dismantled that, I chopped some of it up and built this ladder to the second floor loft. It's all built into the space between the studs and takes up no extra room.

The finished building with stenciled doors and both flaps on the bottom of the doors to be lifted only when needed. The extra long 6 x 6 sill to the left of the photograph has since been cut back close to the post and beveled. We're done.

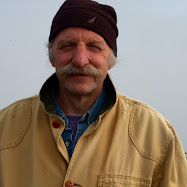
Scott's "Archer" (steward) was sent decades ago here to us from his ironworks in Maine.
We brought him over to this new spot to see how he likes it. So far, not a peep.
We brought him over to this new spot to see how he likes it. So far, not a peep.


fini


